
Play Console setup·About 2 minutes
Add our testers with an email list
Your app is not reachable by our testers yet. Five steps in Play Console fix it, and this page walks through every one.
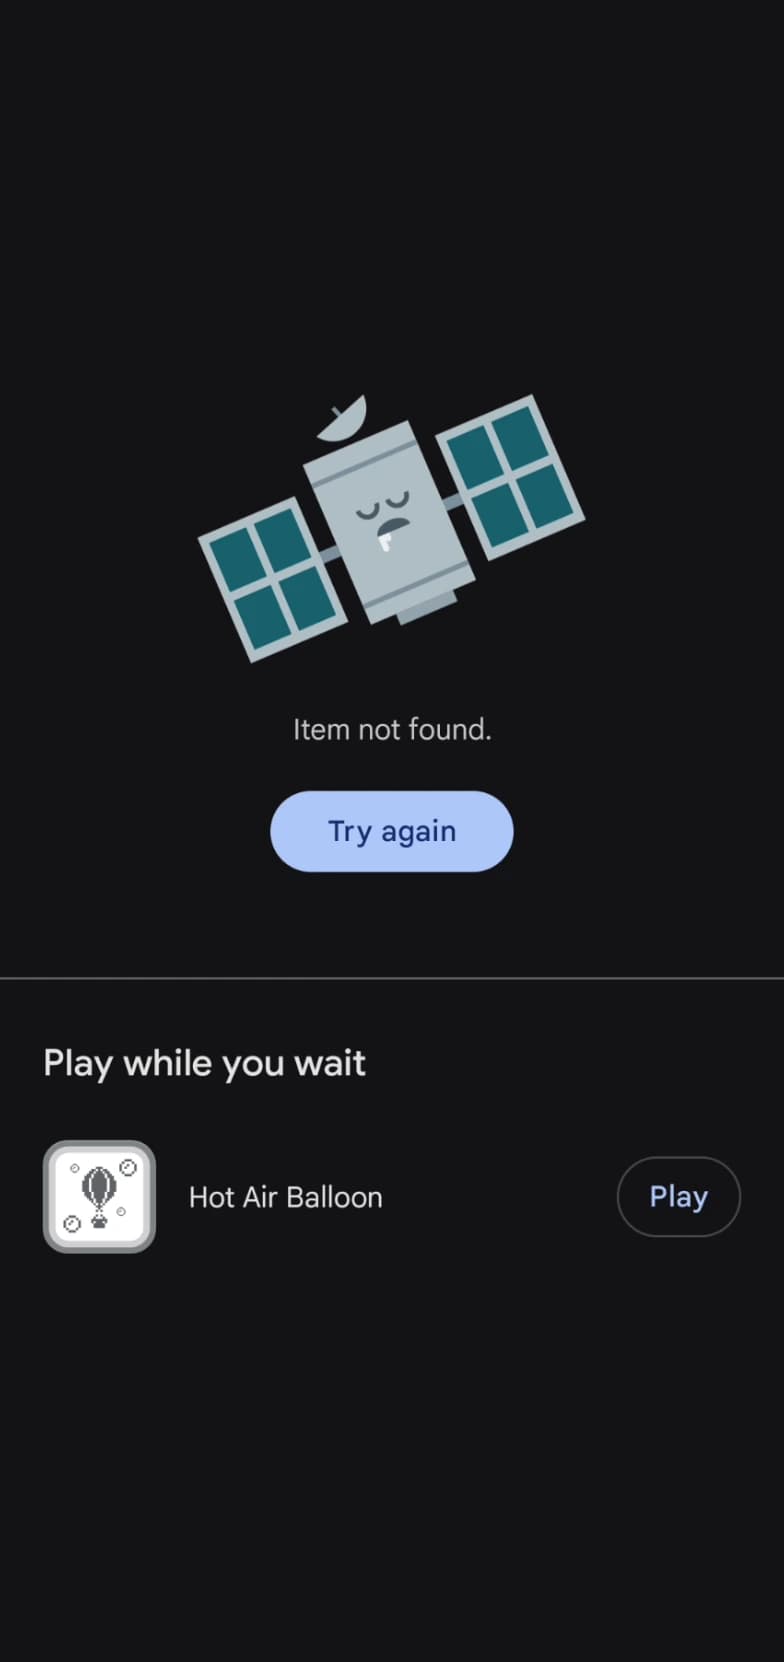
This is what “not accessible” looks like
When the tester list is missing from your closed testing track, our testers open your link and hit “Item not found”. Nobody can install, so nobody can opt in, and your 14 days never start counting.
Everything below fixes exactly that. It takes about two minutes.
The five steps
Tap a number to check it off as you go.
0 of 5 done
Download the testers CSV
One file with every tester address for your closed test.testers-emails.csv- Keep the file. The same list works for every app you publish.
Upload it under Email lists, then tick it
In Play Console, open Test and release, then Testing, then Closed testing, and select your track. On the Testers tab, open the Email lists section, create a list, and upload the CSV.Uploaded the list and saved, leaving its checkbox untickedTicked the checkbox next to the list, then saved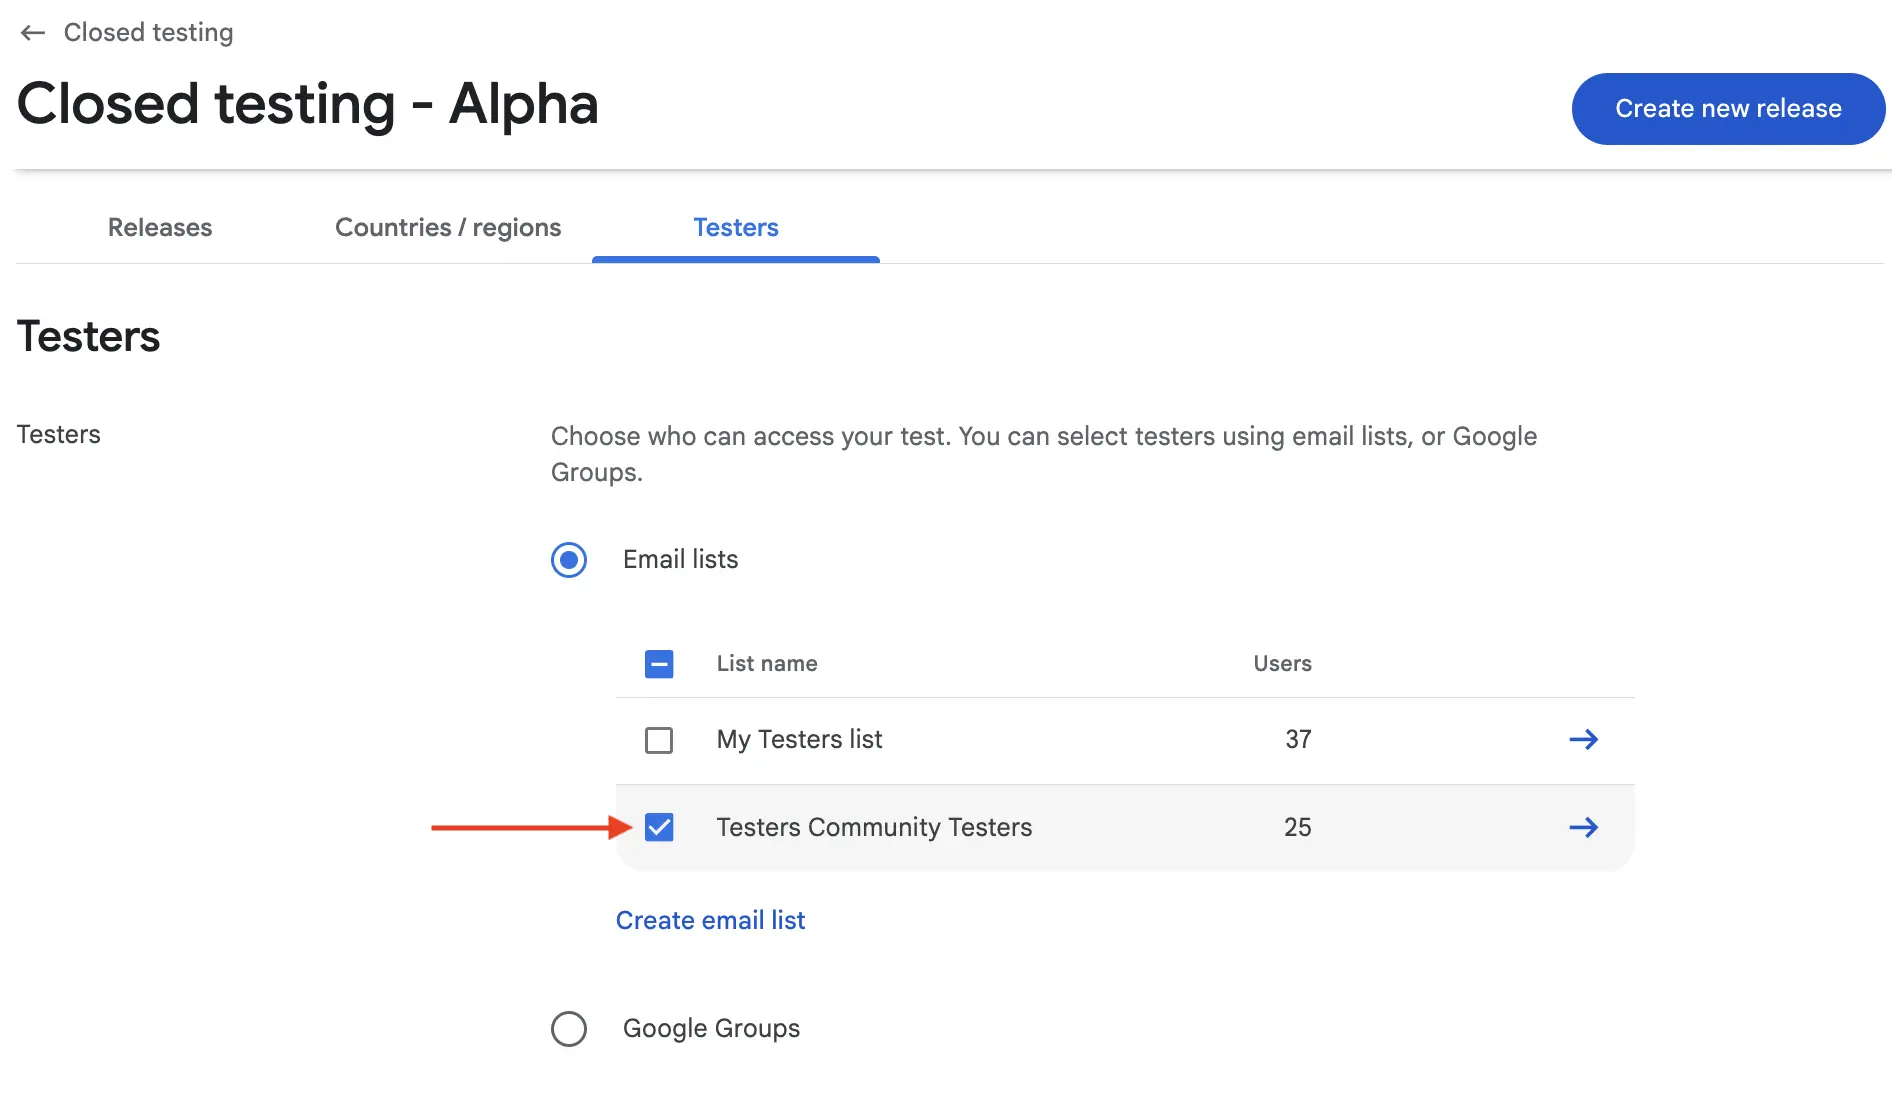
- This is the step almost everyone gets wrong. Creating the list does not attach it to the track.
- Upload the CSV exactly as downloaded. One retyped address drops that tester.
Select all countries
Under Countries / regions, select every available country. Our testers are worldwide, and a country you leave out is a tester who cannot install.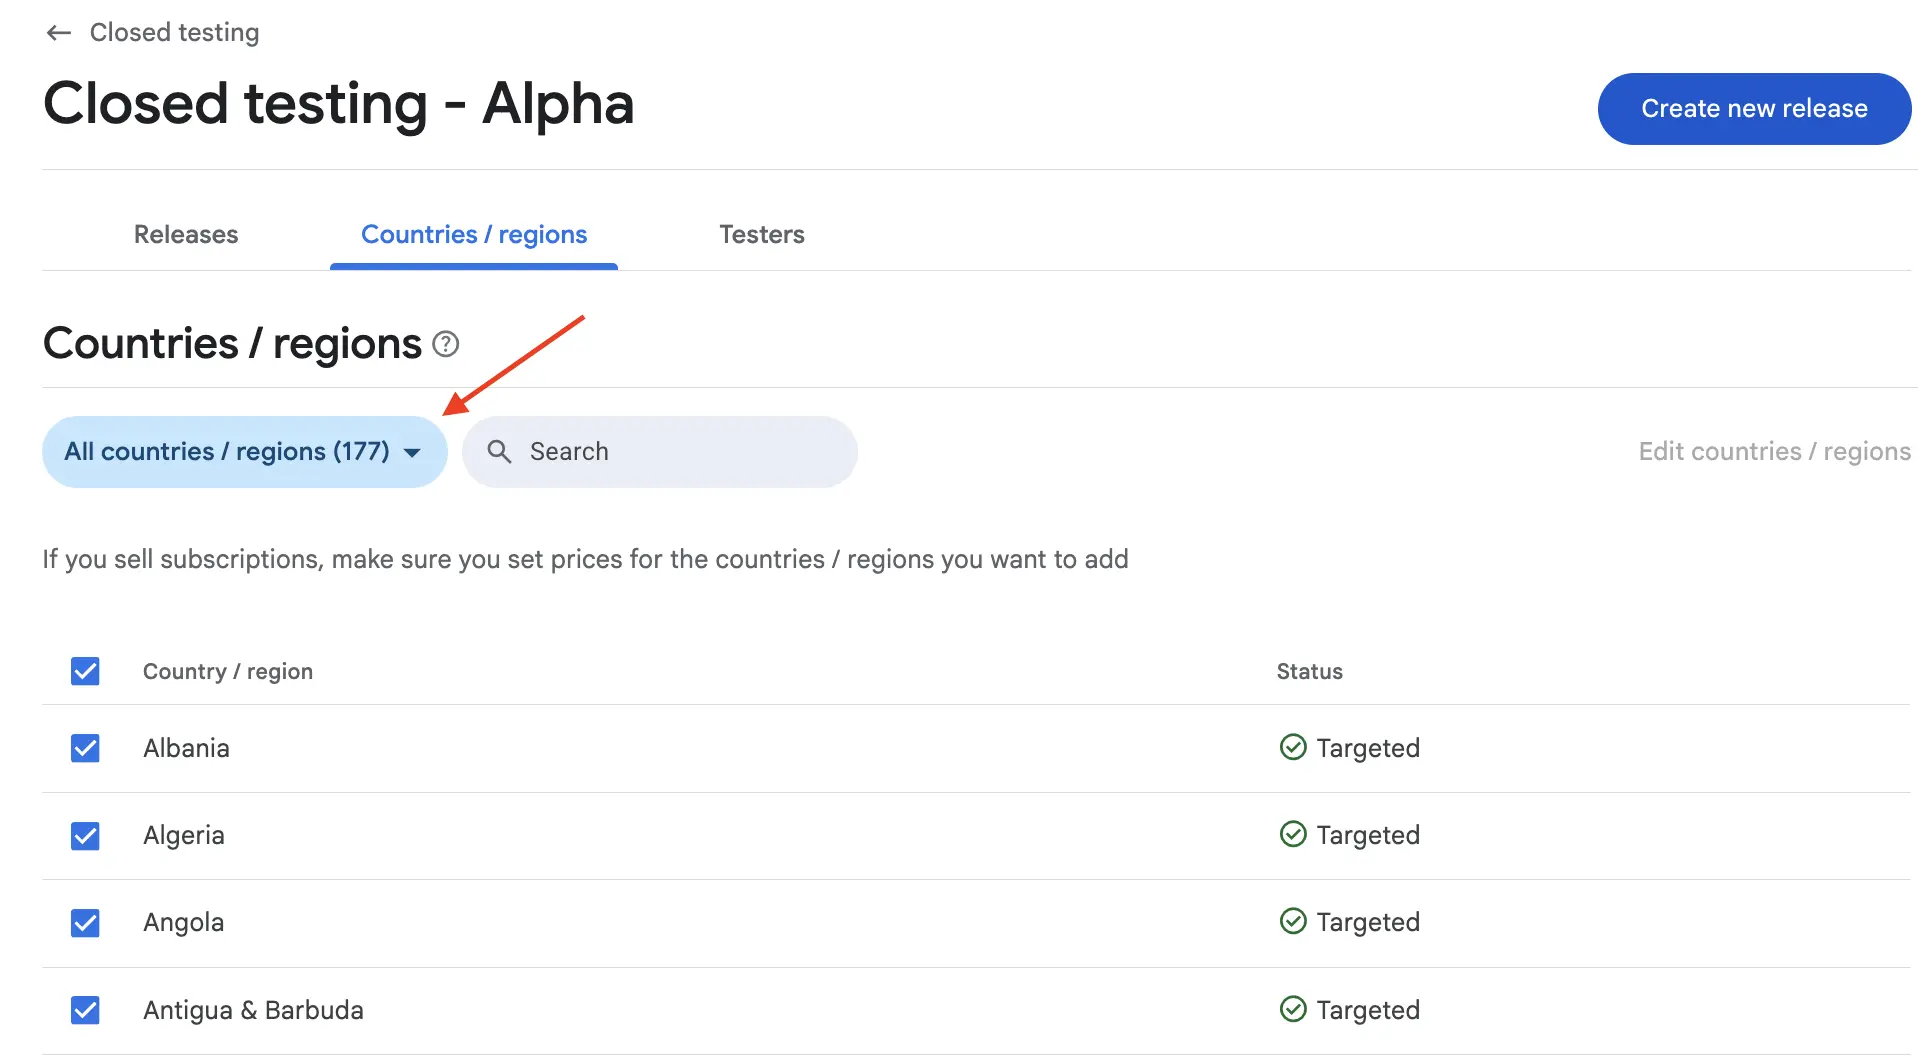
- Use the All countries / regions option rather than picking them by hand.
Send the changes to review
Submit the release for Google's review. Approval usually lands within a few hours.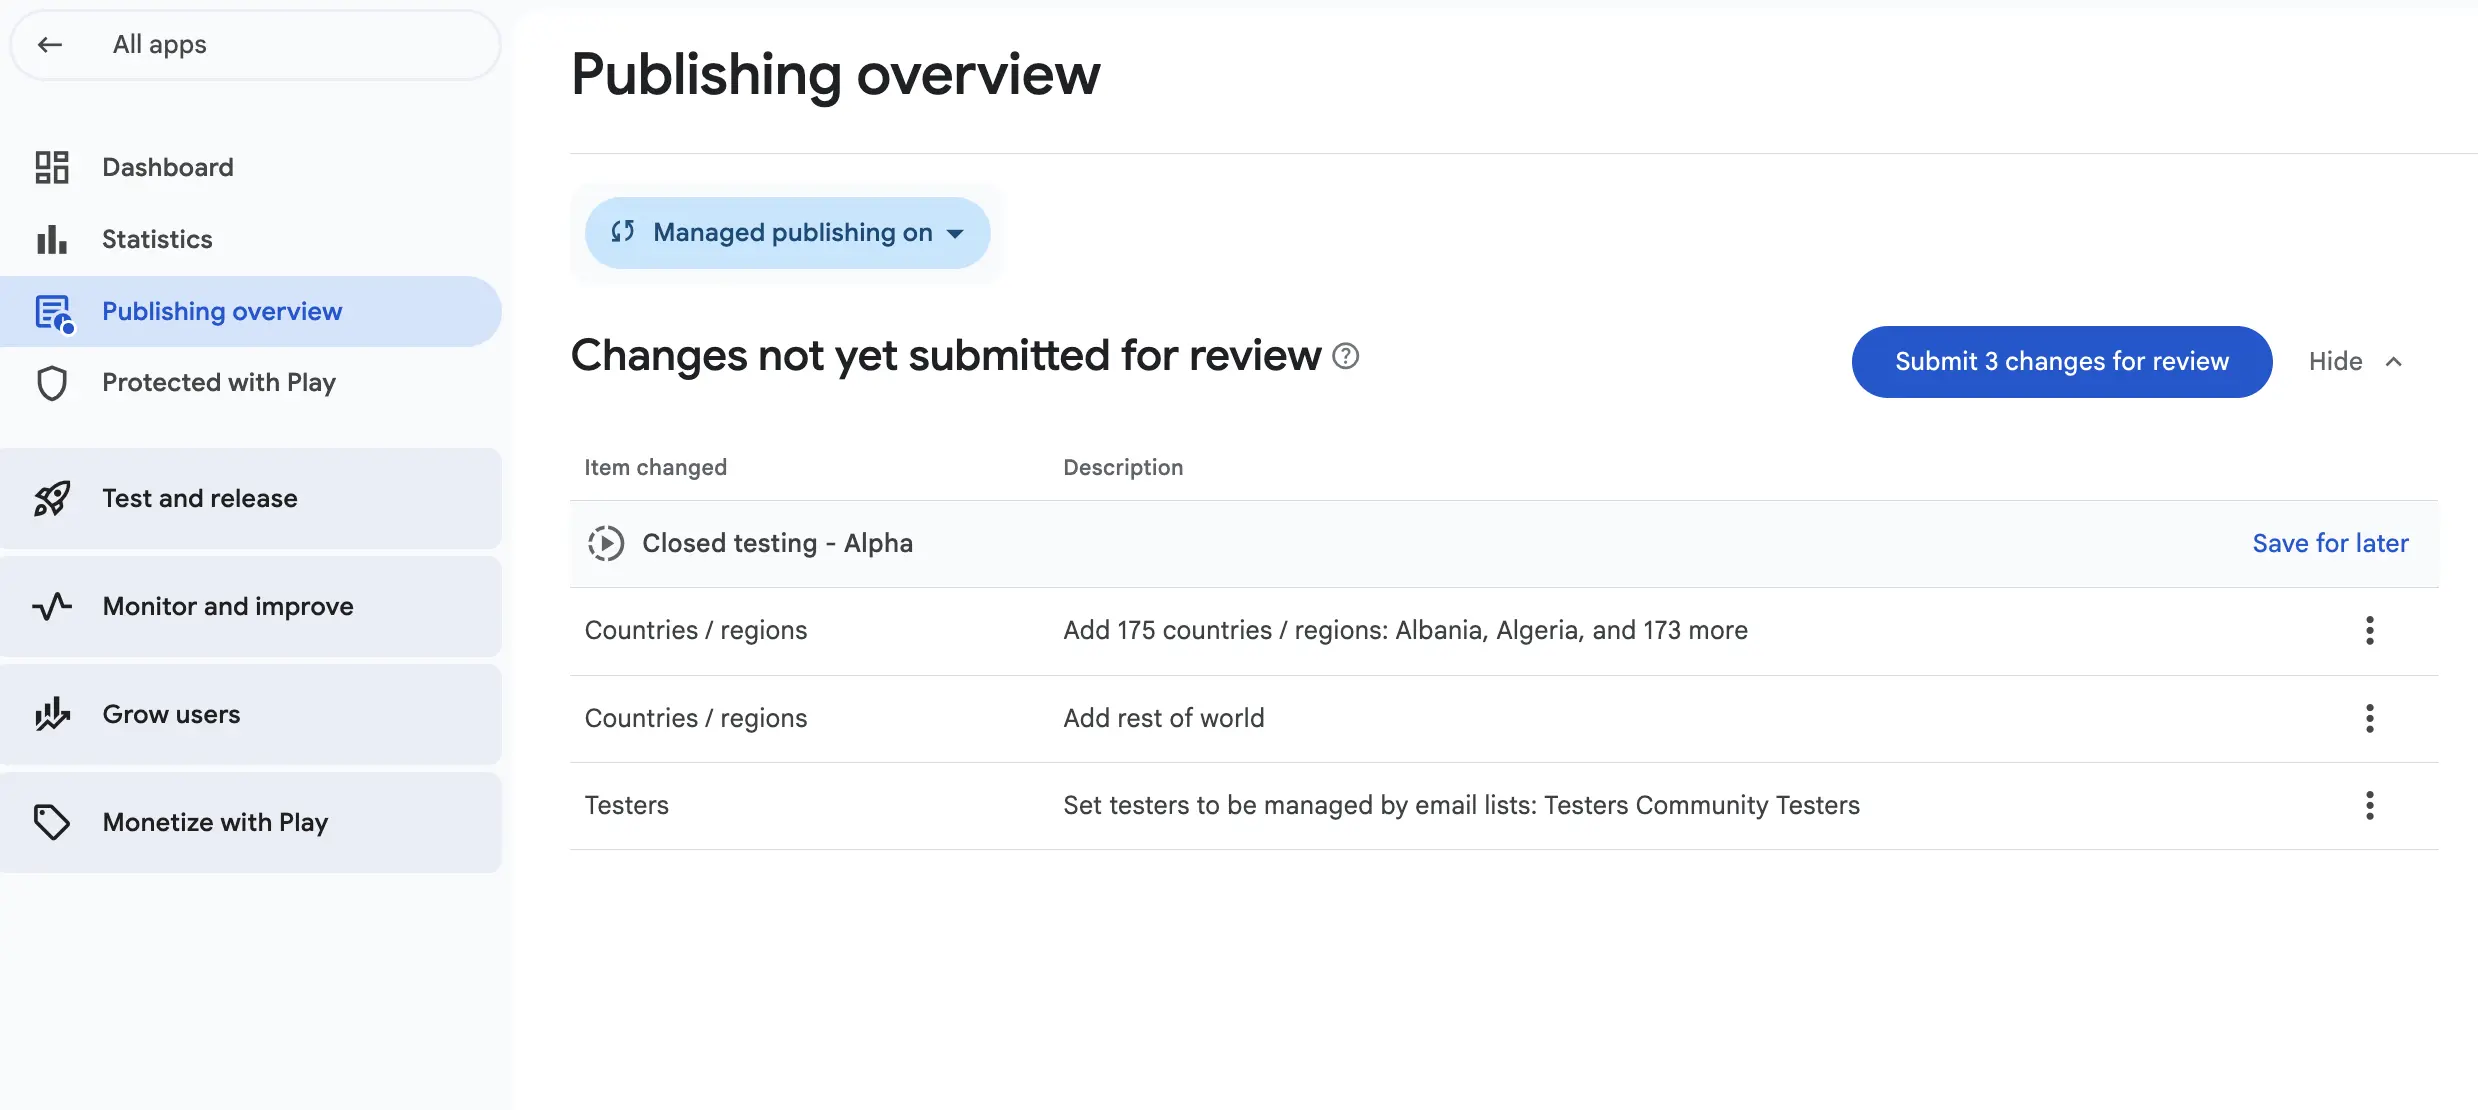
- Save every change first. Unsaved edits are not included in the review.
Publish after approval
Approval is not the same as publishing. Once Google approves, click Publish so the track goes live and testers can opt in.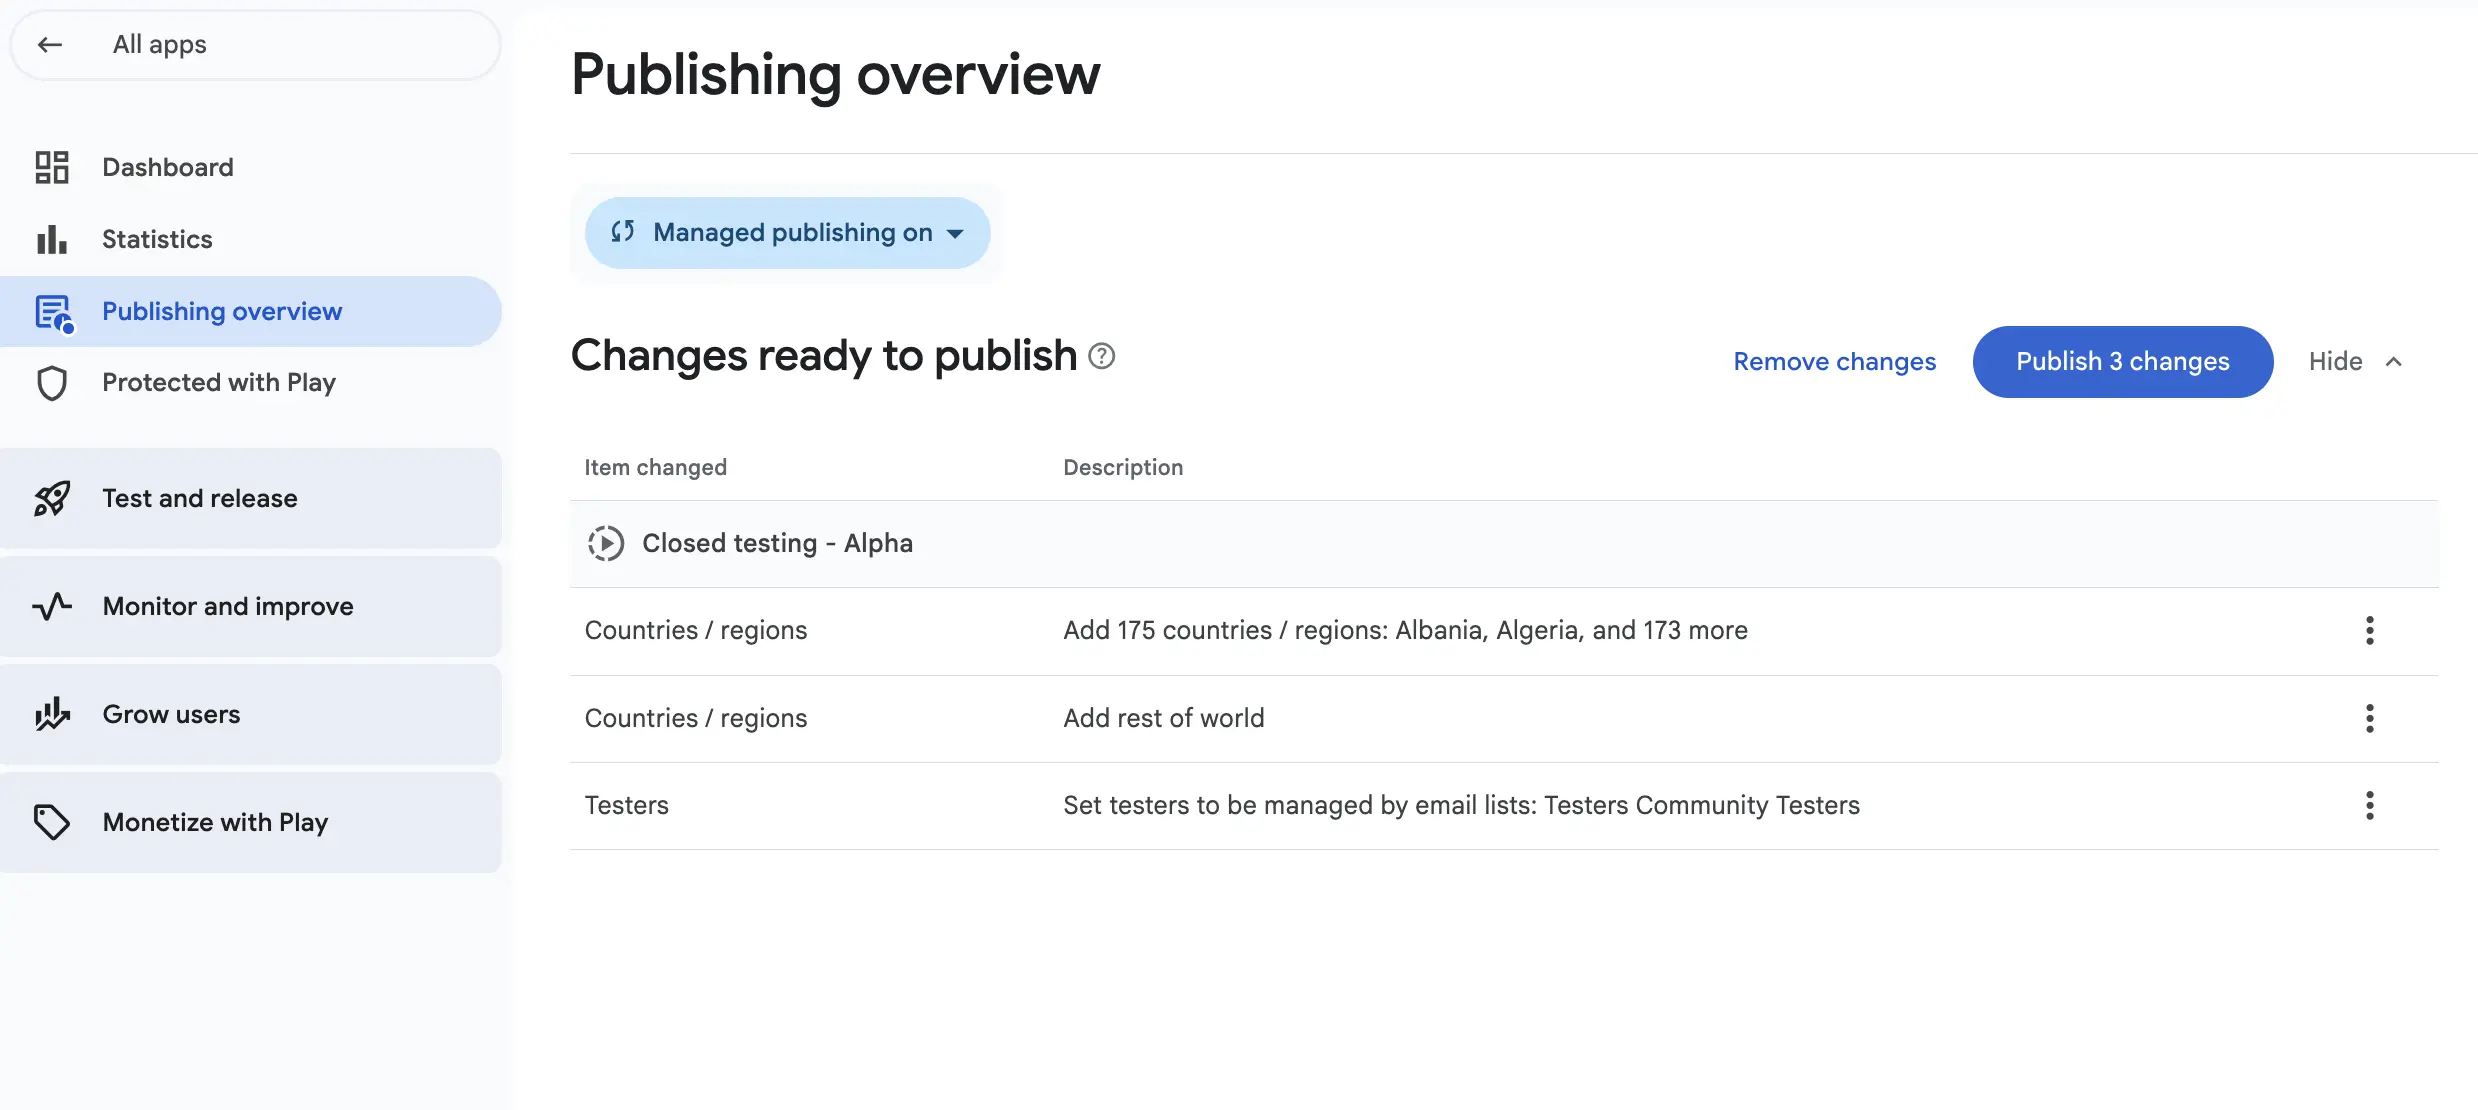
- Approved is not live. The last click is Publish.
The six common mistakes
Almost every app our testers cannot reach comes down to one of these six. Go through them in order and check each one against your own setup. In most cases the fix takes a couple of minutes.
Creating the email list but never ticking it
By far the most common one. The list exists and the CSV is uploaded, but the checkbox next to it on the Testers tab was never selected, so the track lets nobody in.
Retyping the addresses by hand
Upload
testers-emails.csvexactly as downloaded. One typo drops that tester.Leaving countries out
Select all available countries so international testers can reach the app.
Forgetting to save
Click Save after each change before you move on.
Not sending the changes for review
Saved changes still have to be submitted for Google's approval before they go live.
Stopping at approval
Approved is not published. The last click is Publish.
Prefer a Google Group?
Play Console accepts either method. There is a separate guide for that flow.
Stuck on something? We are one email away.
support@testerscommunity.com