
Guide 1 of 4·Day 0·6 min read
Start here: get your app tested
Choose a plan, set up Play Console, and submit your app, with the exact screen for every step.
Setting up takes about ten minutes, and this one guide is every step of it: pick a plan, make your closed testing track accessible in Play Console, and add your app here. After that everything is handled for you, and testing starts within 6 hours.
- 1
Choose your plan
Pick Starter or Pro on the checkout page. Both plans fully cover Google Play's closed testing requirement and take your app all the way to production access, so choose whichever fits your needs. - 2
Add our Google group to your closed testing track
In Play Console, open Test and release, then Testing, then Closed testing, and select your track. On the Testers tab, choose the Google Groups section and add:
This is the most common mistake in the whole setup: the group must go in the Google Groups section, not in Email lists. Email lists will not work.
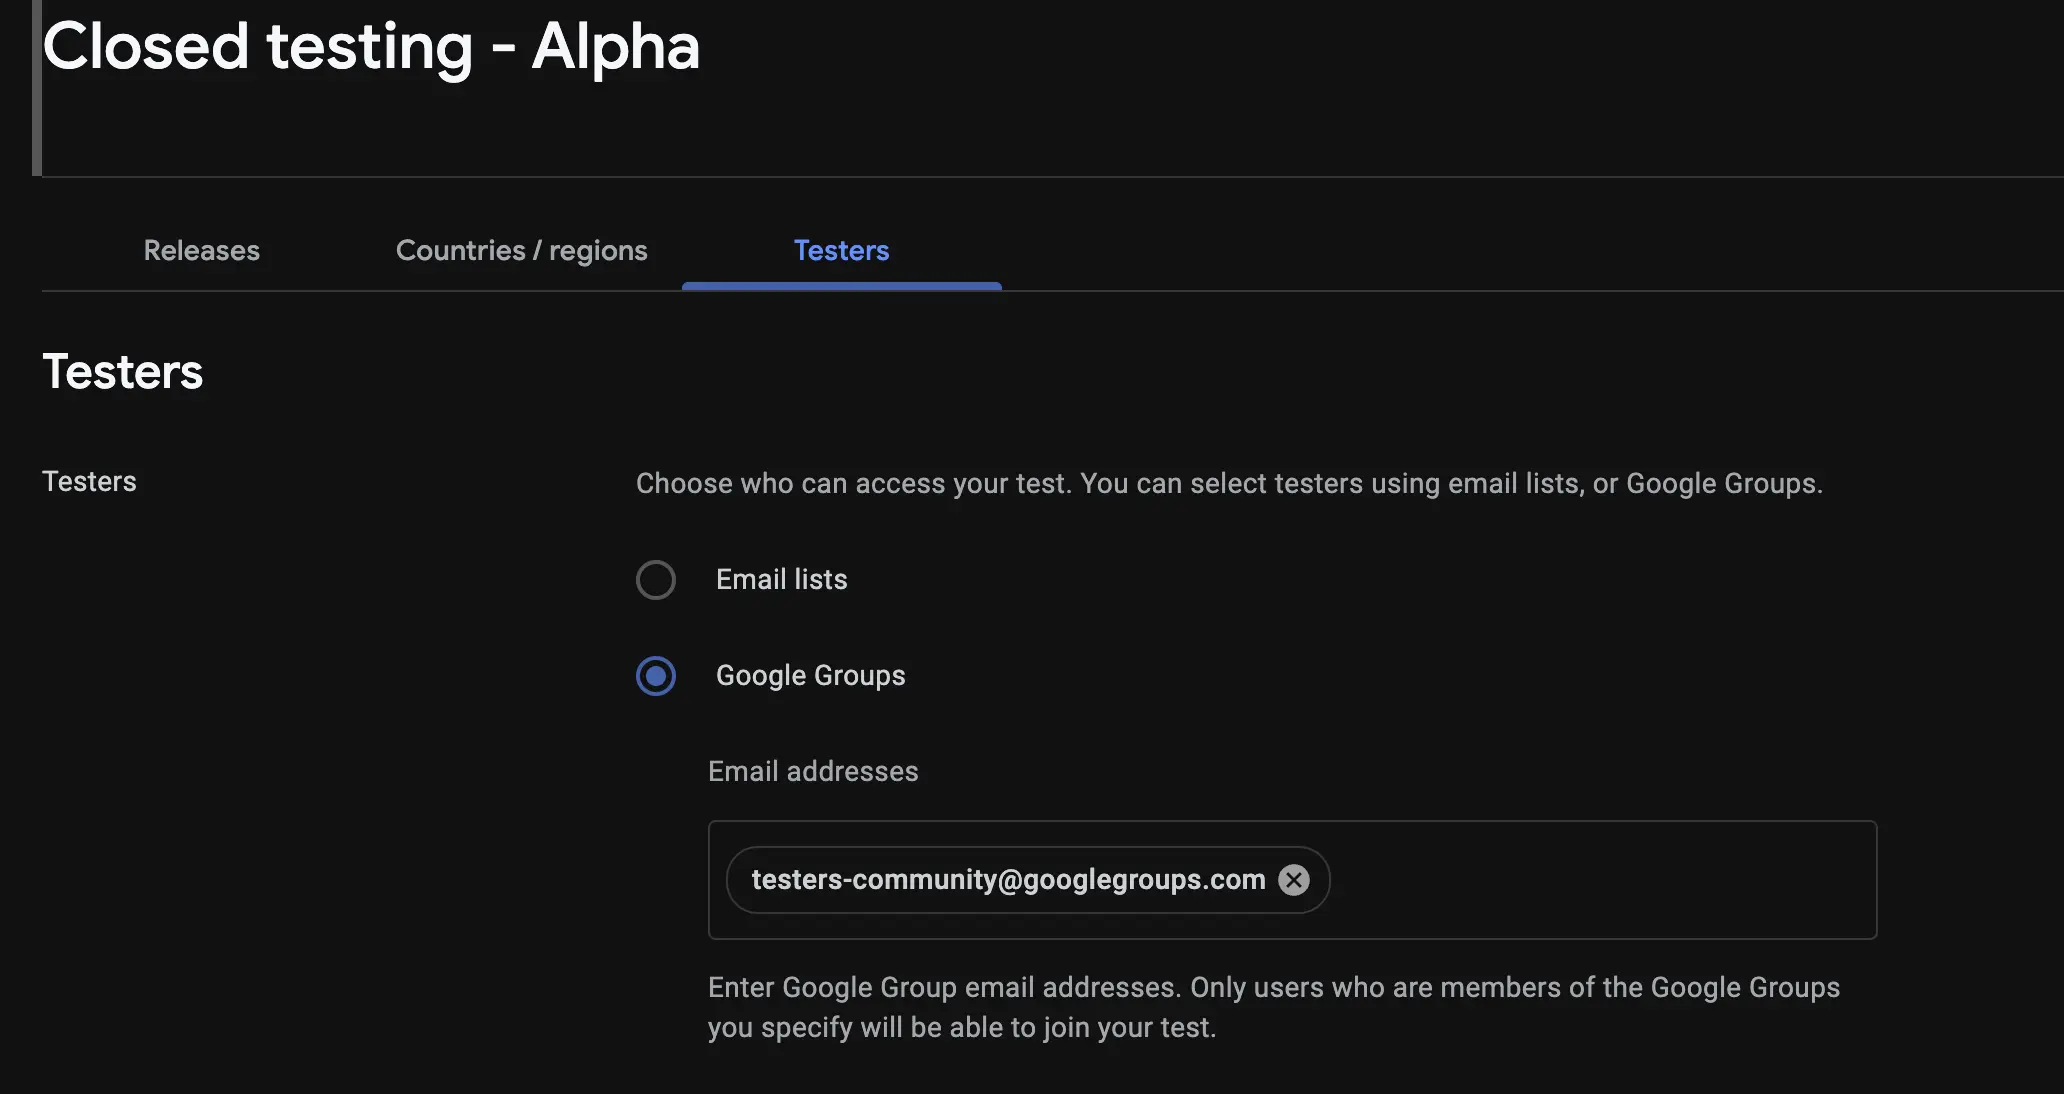
- 3
Select all countries
In the track's Countries / regions section, select all countries. Our testers live in 180+ countries, and every country you leave unselected blocks the testers who live there.
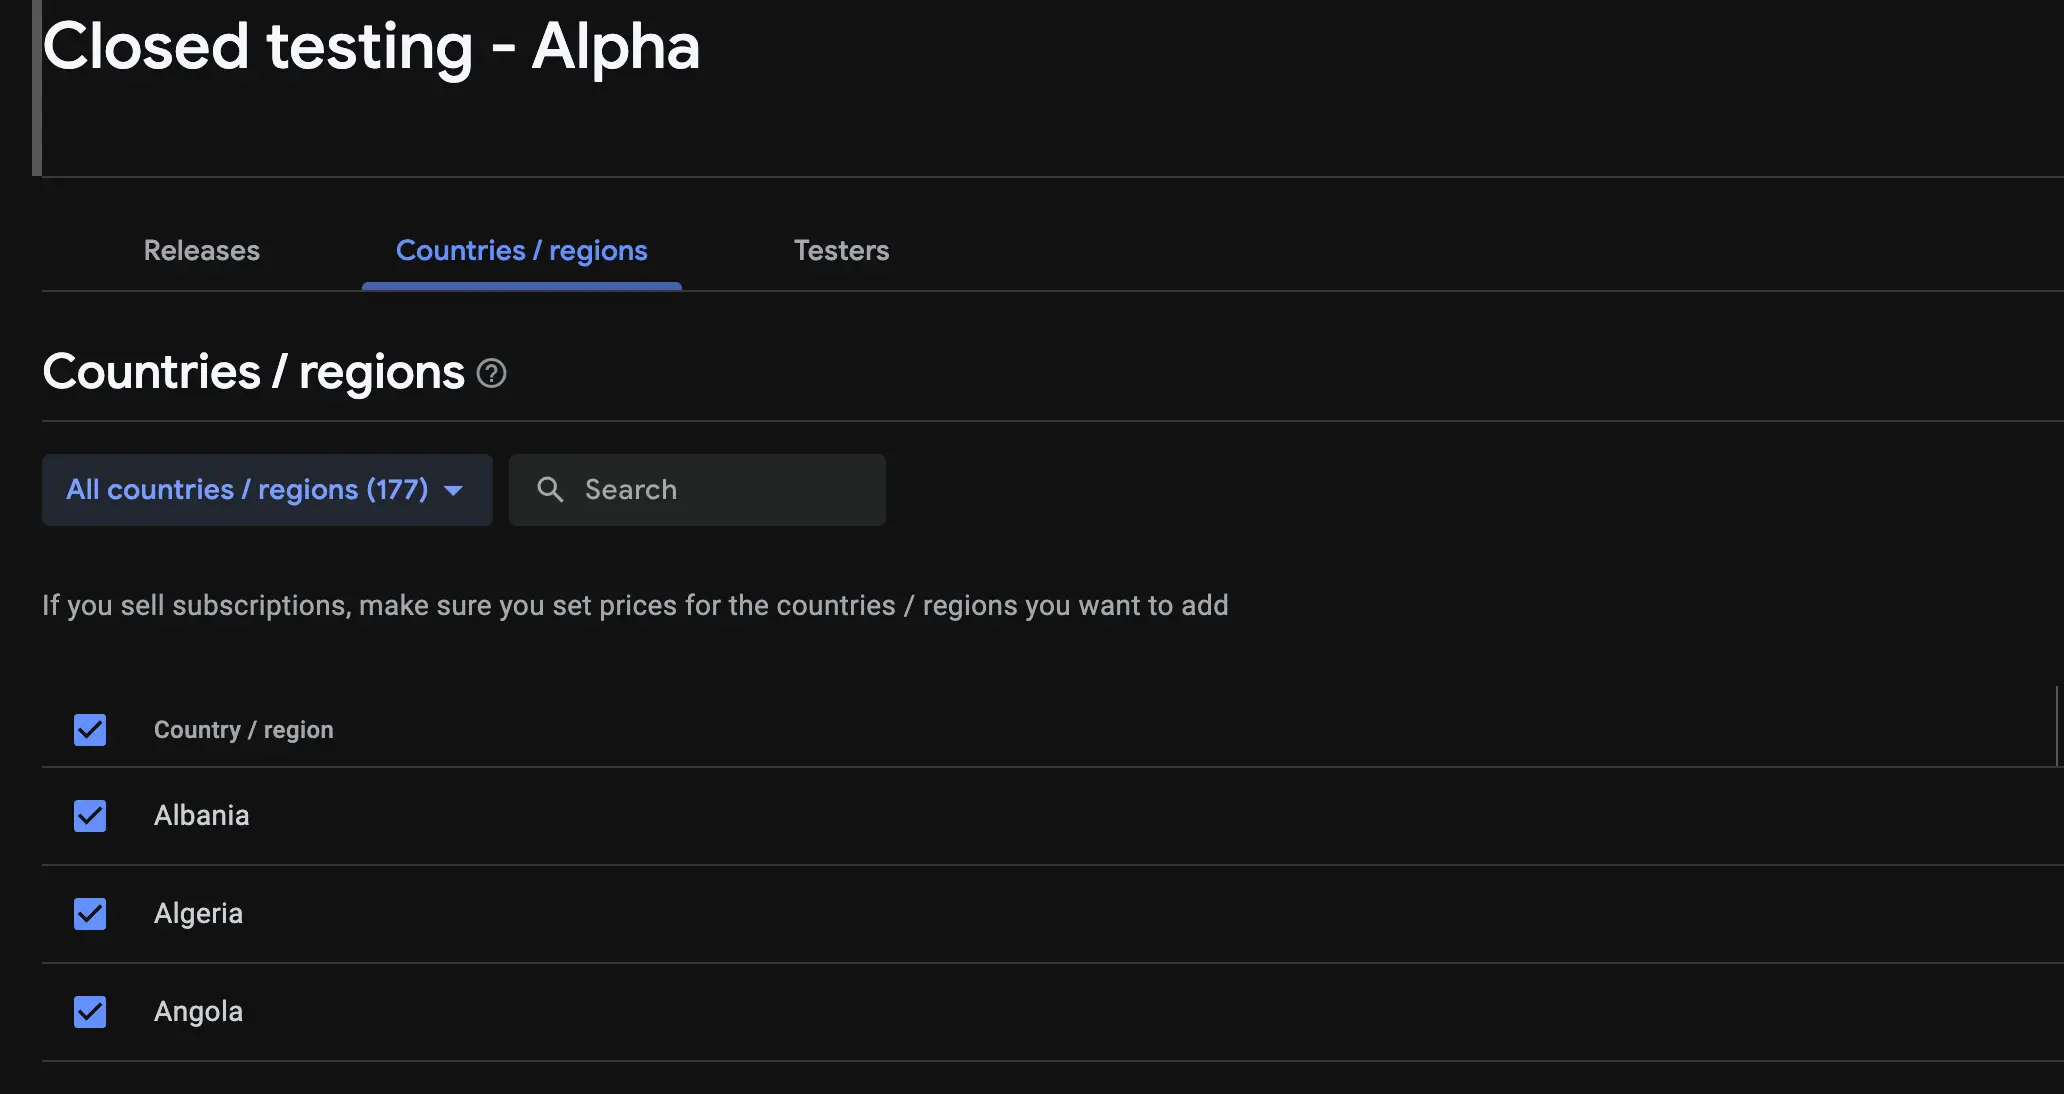
- 4
Send the changes to review
Click Send changes to review in the publishing overview. Google usually approves testing-track changes within 30 to 60 minutes.
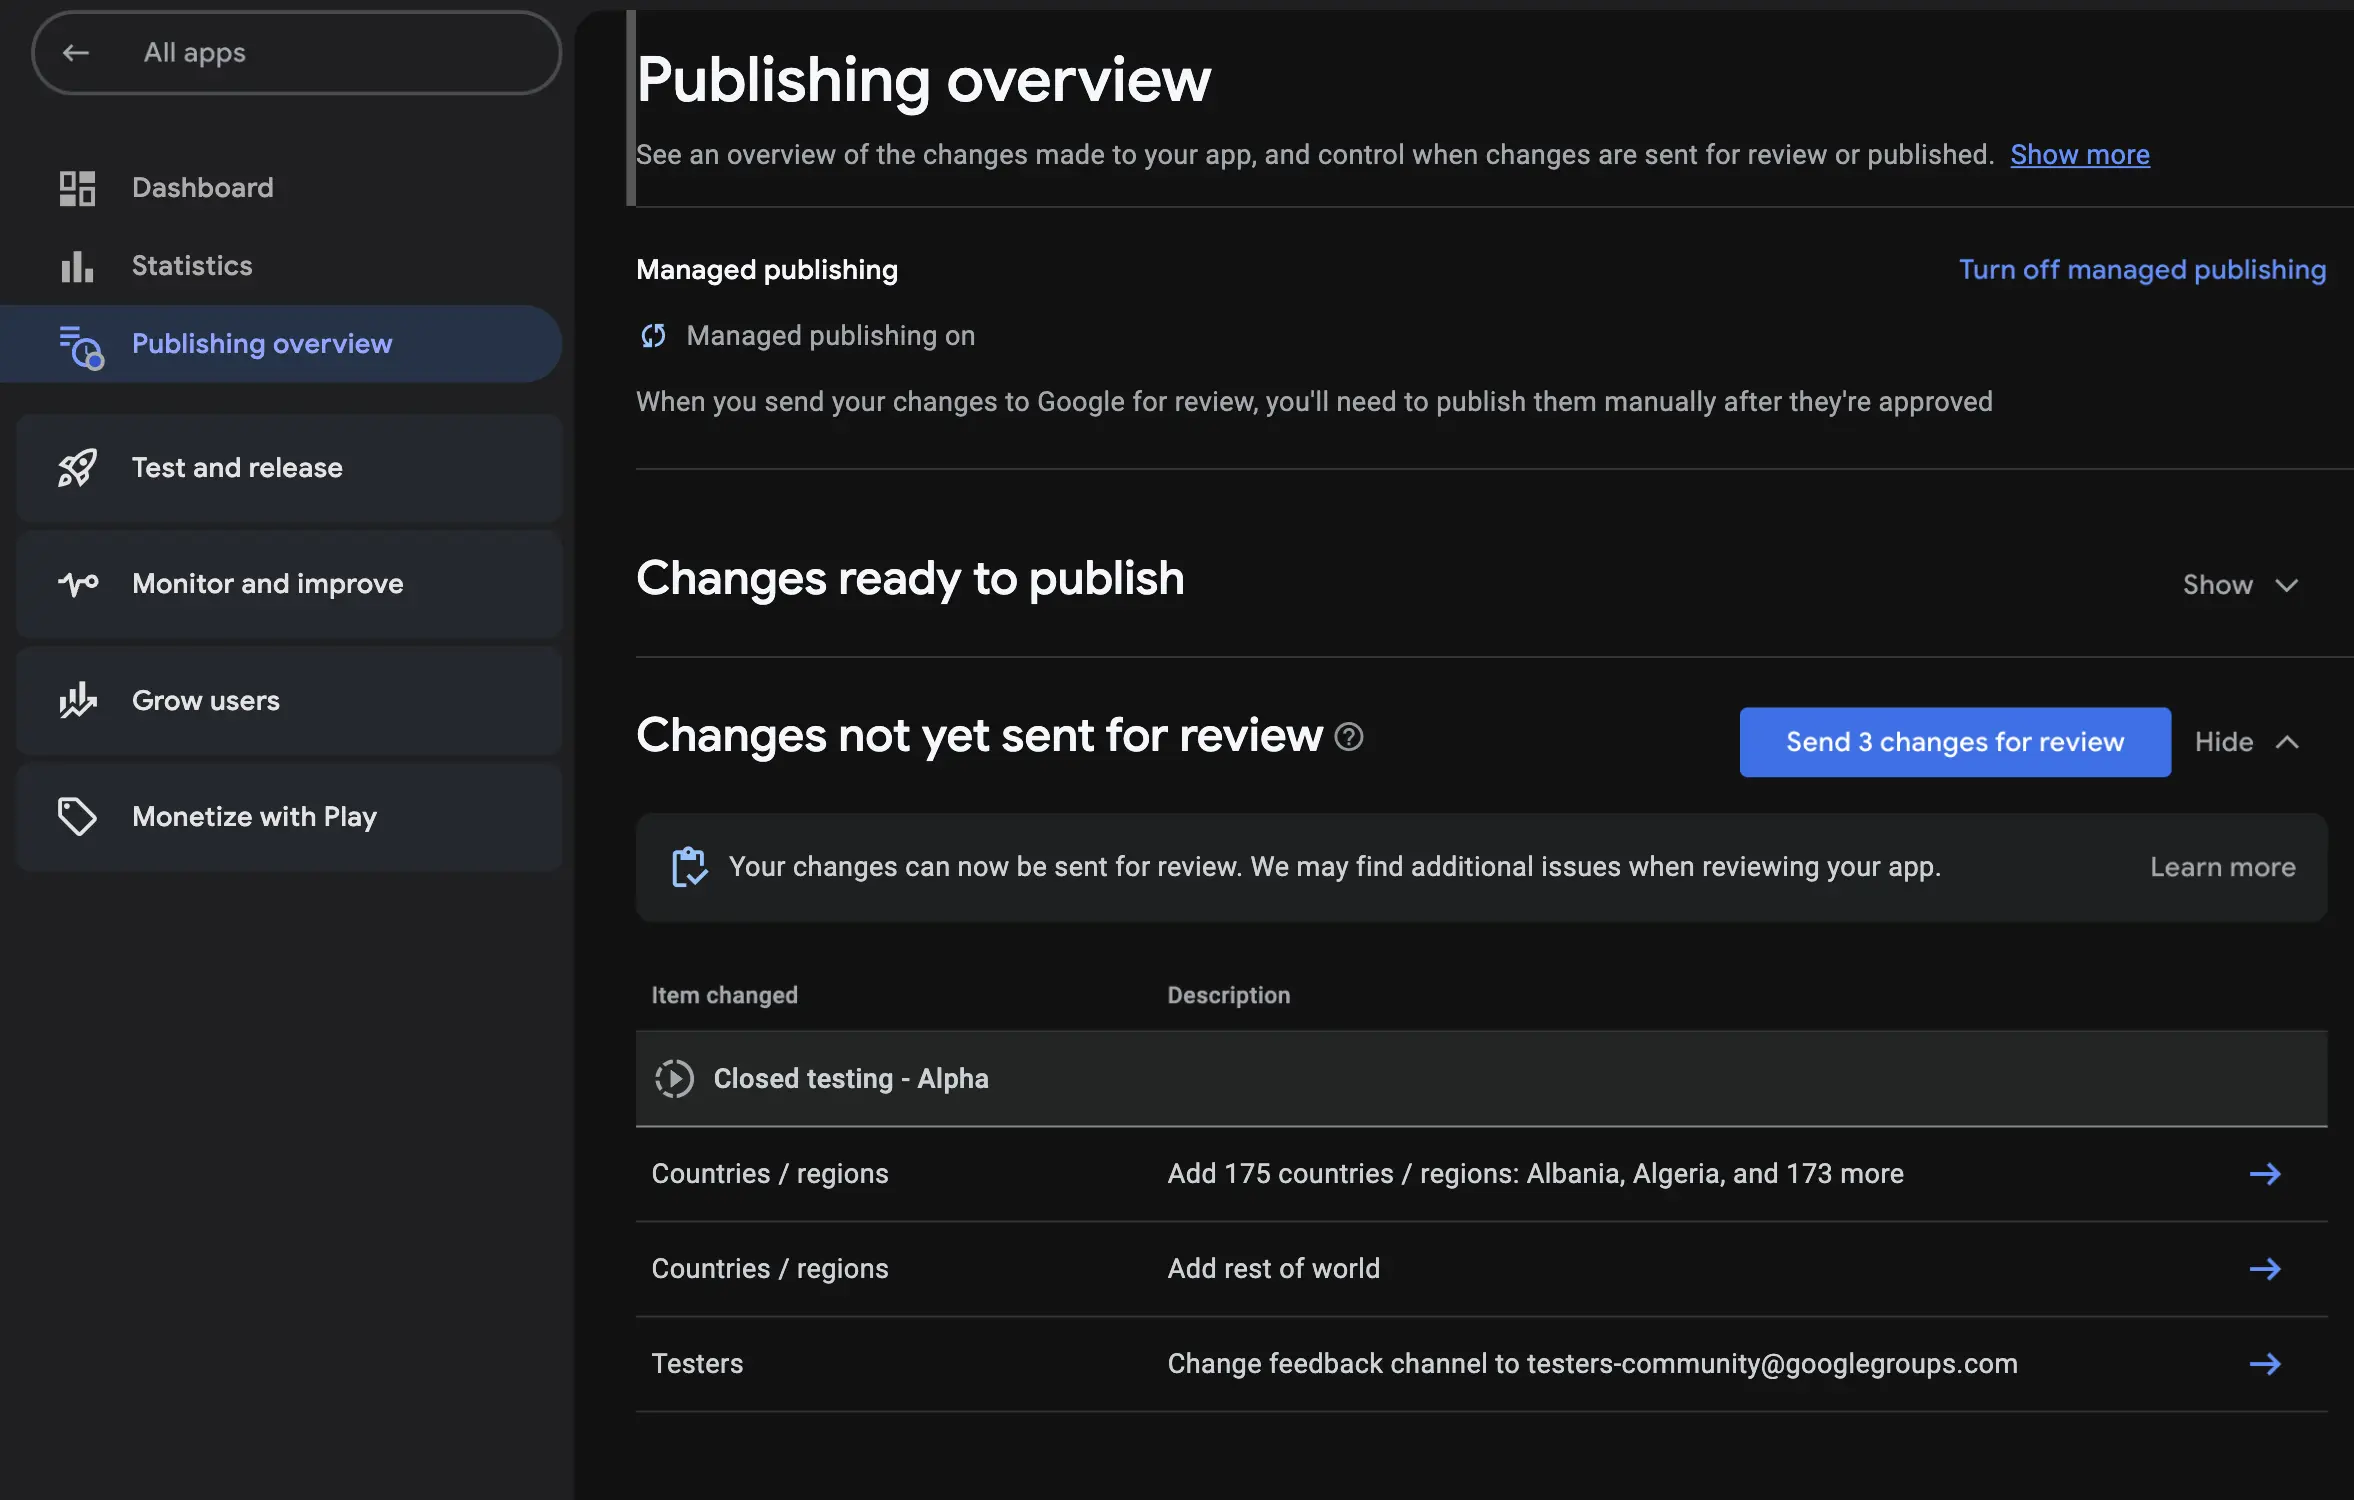
- 5
Publish the changes once approved
Approval is not the same as publishing. When the review clears, go back to the publishing overview and publish the changes so the track goes live.
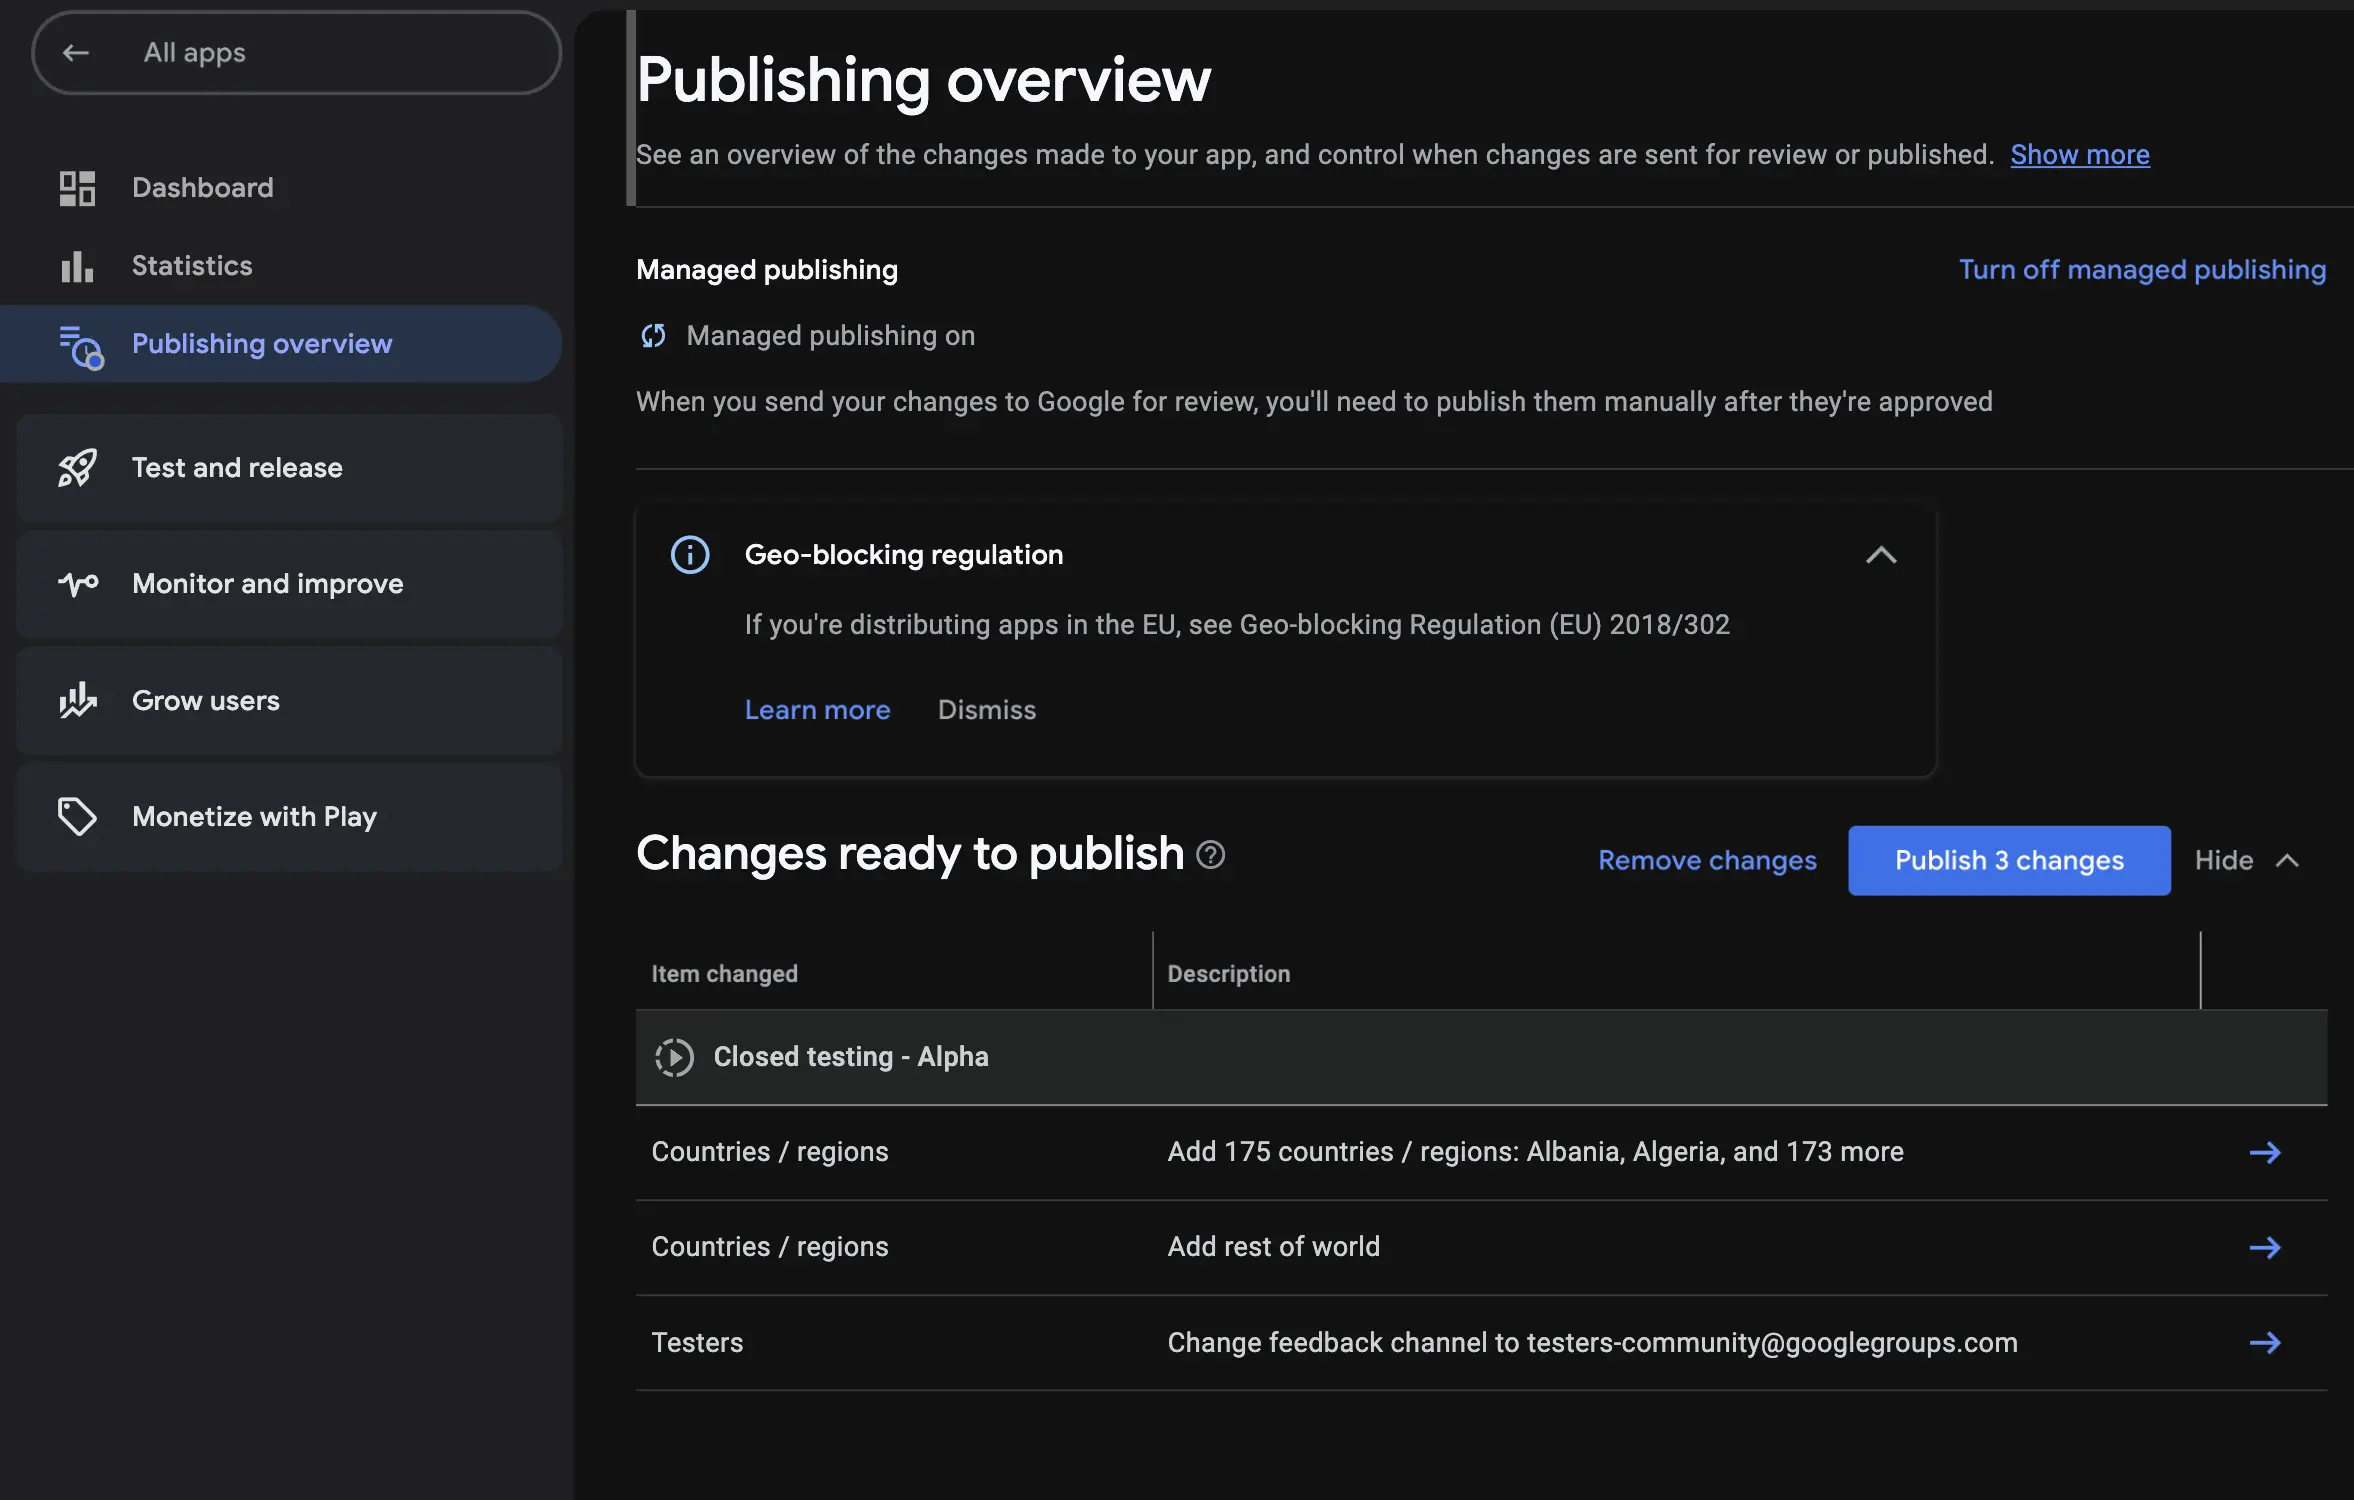
What happens if a Play Console step is missed
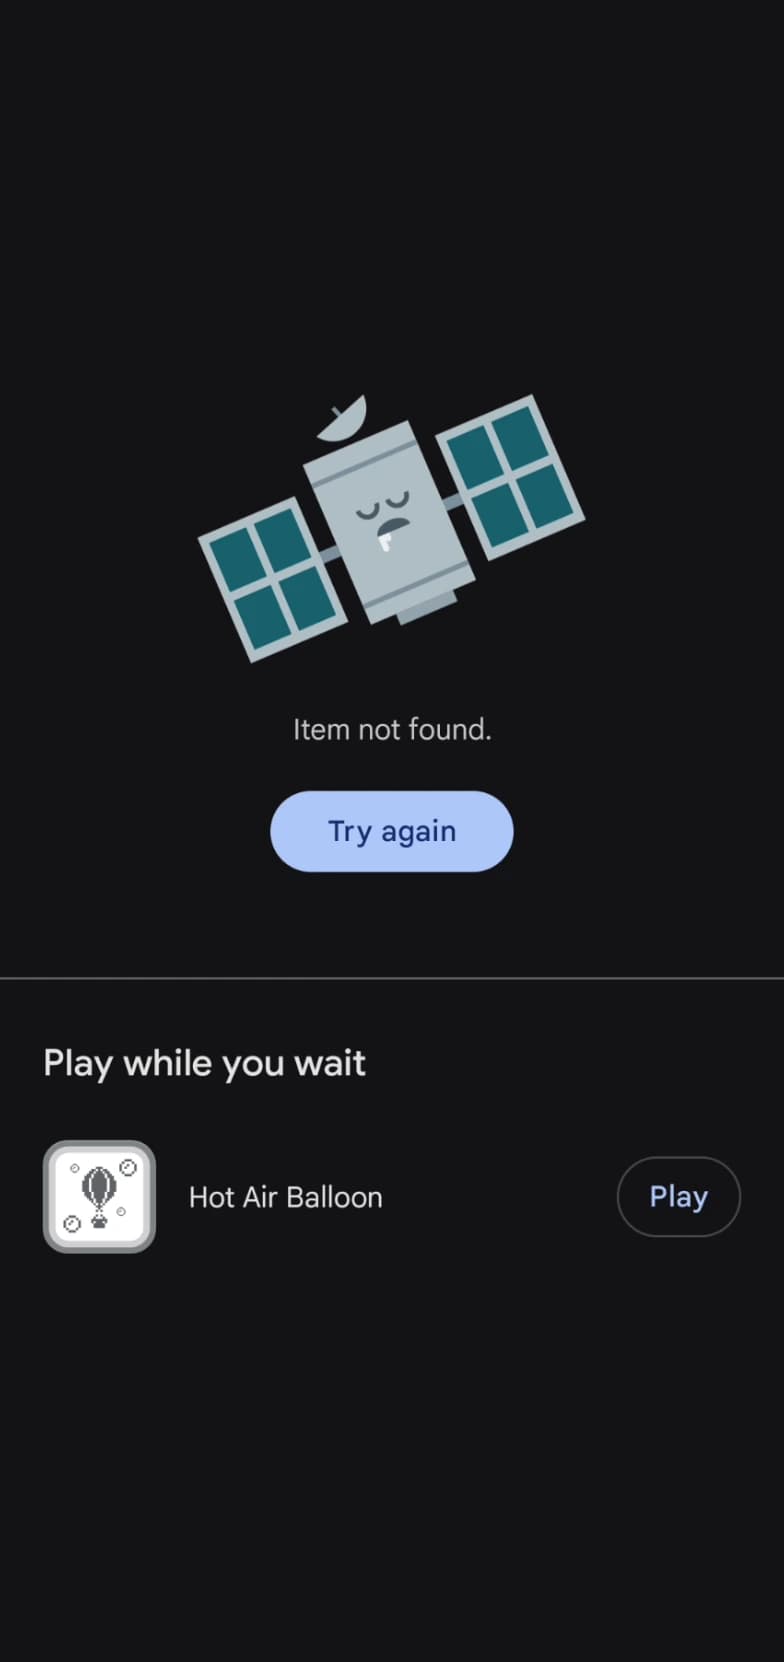
Until steps 2 to 5 are complete, the Play Store shows testers an "Item not found" error instead of your app, and nobody can opt in. If your app shows as inaccessible on your dashboard, walk those steps top to bottom: the culprit is almost always an unsaved change, an unsent review, or an unpublished approval.
- 6
Add your app on Testers Community
Head to Submit App, fill in your app's details, and submit. That is it. Our testers opt in and testing starts within 6 hours.
You're all set
Once your app is submitted, you can watch everything live from your dashboard: opted-in testers, days completed, and your reports as they arrive.
Stuck on something? We are one email away.
support@testerscommunity.com